[TOC]

视频链接:https://www.bilibili.com/video/BV1qS4y1z7iu

资源链接:https://pan.baidu.com/s/1H6NYwlmKiZSf4dN4ZqXhqg?pwd=ryuk 提取码:ryuk

掌握HTML5/CSS3核心知识及实战技巧

掌握CSS3中浮动/定位等布局方案

掌握CSS3中的transitionanimation

掌握基于flex弹性盒模型的布局方案

同行排列的N种实现方案及优缺点对比

CSS3样式编写中的模块思想及封装处理

掌握JS(包含ES6+)、DOM操作等核心知识

掌握DOM事件的核心知识及事件委托

掌握基于JS+CSS3动画的实战处理方案

掌握Promise/async/await异步管控方案

掌握Ajax/Axios的核心应用及数据绑定

基于JS管控video视频播放的解决方案

基于单例设计模式/ESModule实现模块化编程

基于JS实现页卡切换:两种不同处理思想

基于JS实现多种形态轮播图案例开发

基于iscroll插件实现局部滚动

基于JS实现“鼠标滑动的图片幻灯片”特效

基于JS打造炫酷的侧边栏楼层导航

人性化交互设计方案:Loading&防抖&节流

前端性能优化方案:图片懒加载&骨架屏&Skeleton

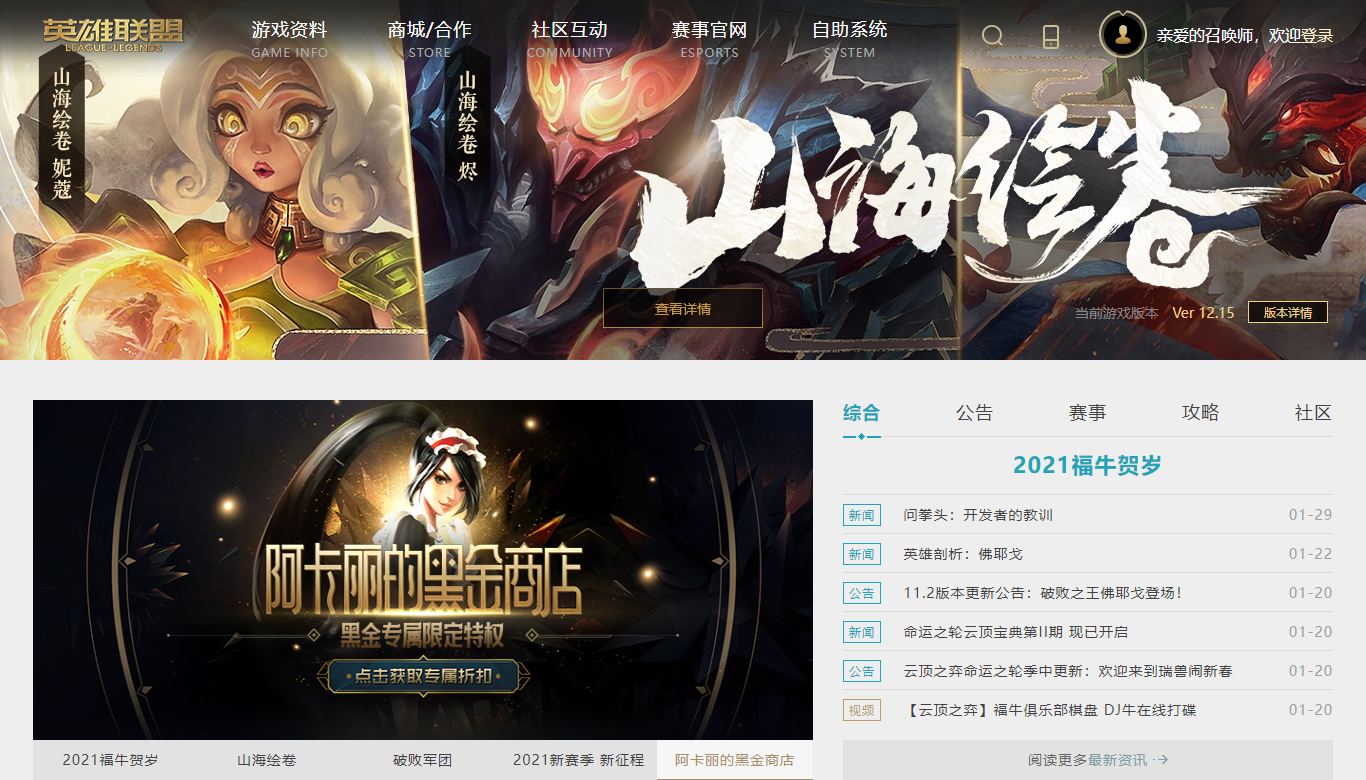
英雄联盟官网案例

模块化思想

  • 基于vue/react/webpack工程化开发(项目中主流思想)

  • 不想用工程化开发的方式,只想自己简单的写法页面,如何实现模块化呢?

    • HTML

      • 分版块设置结构(就写在一起了)
    • CSS

      • 基于前缀区分模块

      • 每个模块单独写在CSS文件中,最后不同模块统一导入到入口文件里,并利用less/sass的嵌套语法简化前缀书写

        • 首页index.html中导入index.less入口文件,同时通入编译lessjs文件

          index.html

          1
          2
          3
          4
          5
          6
          7
          8
          9
          10
          11
          12
          13
          14
          15
          16
          <!DOCTYPE html>
          <html lang="en">
          <head>
          <meta charset="UTF-8">
          <meta http-equiv="X-UA-Compatible" content="IE=edge">
          <meta name="viewport" content="width=device-width, initial-scale=1.0">
          <title>英雄联盟官网</title>

          <!-- 导入less -->
          <link res="stylesheet/less" href="./css/index.less"></link>
          <script src="css/less.min.js"></script>
          </head>
          <body>

          </body>
          </html>

          less浏览器端编译文件下载:https://github.com/less/less.js/releases,下载后在`dist`文件夹

          index.less

          1
          2
          3
          4
          5
          // 公用样式

          @import './reset.min.css'; //格式化浏览器样式
          @import './common.less'; // 公用样式
          @import './head_box.less'; // 头部模块样式
    • JS:不能直接写在不同的js文件中然后导入,最后合并的时候仍然会有变量冲突,这里并不存在模块的概念

      • 基于闭包的方式,实现模块和模块之间变量隔离,防止全局变量污染,也可导出某个模块的方法

        1
        2
        3
        4
        5
        6
        7
        8
        9
        10
        11
        12
        13
        14
        15
        16
        17
        18
        19
        20
        21
        // 头部
        let headModule = (function () {
        let head_box = null,
        n = 0

        const query = function query () {

        }

        return {
        query
        }
        })()

        // 轮播图
        (function() {
        let swiper_box = null,
        n = 1

        headModule.query()
        })()

        这种模式就叫做:单例设计模式

      • 使用<script type="module" src="./js/index.js"></script>,直接让js支持ES6Module的模块化规范,这个声明只会在新版本浏览器中生效。此时在index.js就可以直接使用import语法了。

        拓展:https://www.freesion.com/article/15861435156/

        index.html

        1
        2
        3
        4
        5
        6
        7
        8
        9
        10
        11
        12
        13
        14
        15
        16
        17
        <!DOCTYPE html>
        <html lang="en">
        <head>
        <meta charset="UTF-8">
        <meta http-equiv="X-UA-Compatible" content="IE=edge">
        <meta name="viewport" content="width=device-width, initial-scale=1.0">
        <title>英雄联盟官网</title>

        <!-- 导入less -->
        <link res="stylesheet/less" href="./css/index.less"></link>
        <script src="css/less.min.js"></script>
        </head>
        <body>
        <!-- 导入js入口文件 -->
        <script type="module" src="./js/index.js"></script>
        </body>
        </html>

        index.js

        1
        2
        import './head_box.js' // 不是webpack环境,后缀要加上
        import './swiper_container.js'

其他准备:

  • axios、isScroll、qswebpack中挂载到window上并打包成main.min.js文件,方便使用

    1
    2
    3
    4
    5
    6
    7
    import Iscroll from 'iscroll'
    import axios from 'axios'
    import qs from 'qs'

    window.Iscroll = Iscroll
    window.qs = qs
    window.axios = axios
  • 封装axioshttp.js

    1
    2
    3
    4
    5
    6
    7
    8
    9
    10
    11
    12
    13
    14
    15
    16
    17
    18
    19
    20
    21
    22
    23
    24
    25
    26
    27
    28
    29
    30
    31
    32
    33
    34
    35
    36
    37
    38
    39
    40
    41
    42
    43
    44
    45
    46
    47
    48
    49
    50
    51
    52
    53
    54
    55
    56
    57
    58
    59
    60
    61
    62
    const http = axios.create({
    // 统一请求前缀
    baseURL: 'http://127.0.0.1:8888',
    // 是否允许跨域时候携带资源凭证
    withCredentials: false,
    // 请求成功的状态码校验规则
    validateStatus: status => {
    return status >= 200 && status < 400;
    },
    // 请求头统一处理「设置请求主体专递给服务器的数据格式」
    headers: {
    'Content-Type': 'application/x-www-form-urlencoded'
    },
    // POST系列请求,请求主体传递信息的格式化
    transformRequest: (data, headers) => {
    if (data !== null && typeof data === "object") {
    const ct = headers['Content-Type'];
    if (ct === "application/x-www-form-urlencoded") {
    return qs.stringify(data);
    }
    }
    return data;
    }
    });

    // 请求拦截器:向服务器发送请求之前
    http.interceptors.request.use(config => {
    // ...
    return config;
    });

    // 响应拦截器:获取到响应信息 ~ 自己处理业务逻辑之间
    http.interceptors.response.use(response => {
    // 获取响应主体信息
    return response.data;
    }, reason => {
    // 失败的统一处理「一般就是做相关的提示或者其它操作」
    let response = reason.response;
    if (response) {
    // 服务器有返回值,但是状态码不符合validateStatus校验规则
    switch (response.status) {
    case 400:
    // ...
    break;
    case 401:
    // ...
    break;
    }
    } else {
    // 服务器没有返回任何的信息
    if (reason && reason.code === "ECONNABORTED") {
    // 超时或者请求中断
    }
    if (!navigator.onLine) {
    // 网络出现故障
    }
    }
    return Promise.reject(reason);
    });

    // ES6Module中模块的导出:我想把当前模块中的某个方法,某些东西暴露出去供其他模块调用 export & export default
    export default http;

    如果当前某个模块在另外一个模块导入过了,以后在其他模块再次导入的话,最后浏览器渲染的时候,也只按导入一次处理

    拓展:

  • html也可以进行模块化,但要基于第三方模板引擎,要学一些语法,做模板渲染,相对而言自己在js中动态拼接会简单点。直接将html写在一起也是没问题的

  • 数据不直接写死,后台数据在admin文件夹(为了练习到axios

    • Node版本>12.0.0
    • 启动:node server.js,注意不能关窗口,如果想要关闭窗口服务还在,安装npm i pm2,启动pm2 start server.js --name lol,结束np2 stop lol
    • 可以学习一下,mock数据怎么简单搭建成api服务

备注:实际真正开发的时候,还是会使用webpack静态资源打包器来进行开发的

头部导航模块

搭结构

  • 尽可能减少层级嵌套,嵌套越深,性能消耗越大(涉及到浏览器底层渲染机制,V8引擎是怎么渲染的,从DOM树到CSSOM树,再到RenderTree

  • 尽可能标签语义化,让合理的标签做合适的事情,利于seo优化

  • H5中都有哪些标签(要背,烂熟于心):

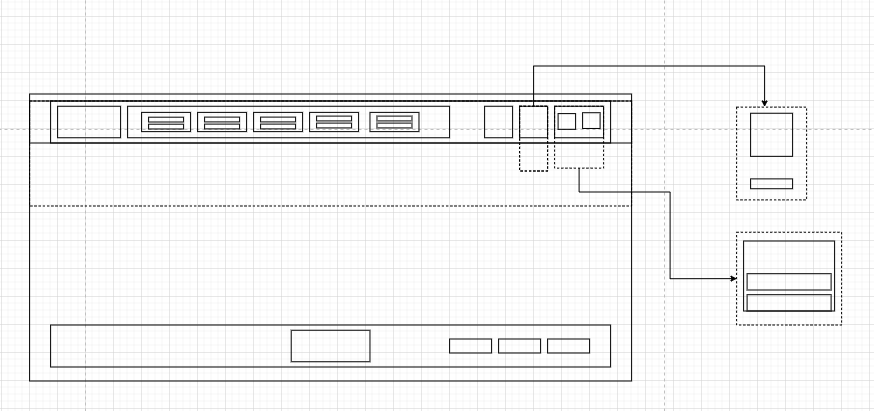
  • 画结构

    image-20220810164653879

  • 我们用vscodeliveServer启动页面

  • 根据结构写代码

    index.html

    1
    2
    3
    4
    5
    6
    7
    8
    9
    10
    11
    12
    13
    14
    15
    16
    17
    18
    19
    20
    21
    22
    23
    24
    25
    26
    27
    28
    29
    30
    31
    32
    33
    34
    35
    36
    37
    38
    39
    40
    41
    42
    43
    44
    45
    46
    47
    48
    49
    50
    51
    52
    53
    54
    55
    56
    57
    58
    59
    60
    61
    62
    63
    64
    65
    66
    67
    68
    69
    70
    71
    72
    73
    74
    75
    76
    77
    78
    79
    80
    81
    82
    83
    84
    85
    86
    87
    88
    89
    90
    91
    92
    93
    94
    95
    96
    97
    98
    99
    100
    101
    102
    <!DOCTYPE html>
    <html lang="en">
    <head>
    <meta charset="UTF-8">
    <meta http-equiv="X-UA-Compatible" content="IE=edge">
    <meta name="viewport" content="width=device-width, initial-scale=1.0">
    <title>英雄联盟官网</title>

    <!-- 导入less -->
    <link rel="stylesheet/less" href="./css/index.less"></link>
    <script src="css/less.min.js"></script>
    </head>
    <body>
    <script src="./js/main.min.js"></script>
    <!-- 导入js入口文件 -->
    <script type="module" src="./js/index.js"></script>

    <!-- 头部区域开始 -->
    <div class="head-box">
    <!-- 顶部 -->
    <div class="common-head">
    <!-- LOGO -->
    <a href="" class="head-logo">
    <img src="images/logo-public.png" alt="">
    </a>
    <!-- NAV -->
    <nav class="head-nav">
    <a href=""><span></span><span></span></a>
    <a href=""><span></span><span></span></a>
    <a href=""><span></span><span></span></a>
    <a href=""><span></span><span></span></a>
    <a href=""><span></span><span></span></a>
    </nav>
    <!-- 按钮组 -->
    <a href="" class="head-search"></a>
    <a href="" class="head-weixin">
    <div class="wx-detail">
    <img src="" alt="">
    <p></p>
    <img src="" alt="">
    </div>
    </a>
    <!-- 个人中心 -->
    <div class="head-person">
    <div class="person-base">
    <a href="" class="base-logo">
    <img src="" >
    </a>
    <p></p>
    </div>
    <div class="person-detail">
    <div class="detail-text">
    <p></p>
    <p></p>
    </div>
    <a class="detail-more" href="">
    <i class="common-more"></i>
    </a>
    </div>
    </div>
    </div>
    <!-- 顶部遮罩层 -->
    <div class="common-head-mask">

    </div>
    <!-- 作者区域 -->
    <div class="author-box">
    <span></span>
    <span></span>
    <a href=""></a>
    </div>
    <!-- 背景按钮 -->
    <a href="" class="background-btn">

    </a>
    <!-- 导航详情 -->
    <div class="nav-detail">
    <ul class="detail-con">
    <li>
    <a href=""></a>
    <a href="">
    <i class="icon-new"></i>
    </a>
    </li>
    <li>
    <a href=""></a>
    <a href="">
    <i class="icon-new"></i>
    </a>
    </li>
    <li>
    <a href=""></a>
    <a href="">
    <i class="icon-new"></i>
    </a>
    </li>
    </ul>
    </div>
    </div>
    <!-- 头部区域结束 -->
    </body>
    </html>

    index.less

    1
    2
    3
    4
    5
    // 公用样式

    @import './reset.min.css'; //格式化浏览器样式
    @import './common.less'; // 公用样式
    @import './head_box.less'; // 头部模块样式

    在结构上丰富内容:粘贴英雄联盟官网的文字、引入图片资源

    导航栏一般都是写死的,不涉及数据绑定

    index.html完善数据

    1
    2
    3
    4
    5
    6
    7
    8
    9
    10
    11
    12
    13
    14
    15
    16
    17
    18
    19
    20
    21
    22
    23
    24
    25
    26
    27
    28
    29
    30
    31
    32
    33
    34
    35
    36
    37
    38
    39
    40
    41
    42
    43
    44
    45
    46
    47
    48
    49
    50
    51
    52
    53
    54
    55
    56
    57
    58
    59
    60
    61
    62
    63
    64
    65
    66
    67
    68
    69
    70
    71
    72
    73
    74
    75
    76
    77
    78
    79
    80
    81
    82
    83
    84
    85
    86
    87
    88
    89
    90
    91
    92
    93
    94
    95
    96
    97
    98
    99
    100
    101
    102
    103
    104
    105
    106
    107
    108
    109
    110
    111
    112
    113
    114
    115
    116
    117
    118
    119
    120
    121
    122
    123
    124
    125
    126
    127
    128
    129
    130
    131
    132
    133
    134
    135
    136
    137
    138
    139
    140
    141
    142
    143
    144
    145
    146
    147
    148
    149
    150
    151
    152
    153
    154
    155
    156
    157
    158
    159
    160
    161
    162
    163
    164
    165
    166
    167
    168
    169
    170
    171
    172
    173
    174
    175
    176
    177
    178
    179
    180
    181
    182
    183
    184
    185
    186
    187
    188
    189
    190
    191
    192
    193
    194
    195
    196
    197
    198
    199
    200
    <!DOCTYPE html>
    <html lang="en">
    <head>
    <meta charset="UTF-8">
    <meta http-equiv="X-UA-Compatible" content="IE=edge">
    <meta name="viewport" content="width=device-width, initial-scale=1.0">
    <title>英雄联盟官网</title>

    <!-- 导入less -->
    <link rel="stylesheet/less" href="css/index.less"></link>
    <script src="css/less.min.js"></script>
    </head>
    <body>
    <!-- 头部区域开始 -->
    <header class="head-box">
    <!-- 顶部 -->
    <div class="common-head">
    <!-- LOGO -->
    <a href="https://lol.qq.com" class="head-logo">
    <img src="images/logo-public.png" alt="">
    </a>
    <!-- NAV -->
    <nav class="head-nav">
    <a href="https://101.qq.com/#/hero" target="_blank">
    <span>游戏资料</span>
    <span>GAME INFO</span>
    </a>
    <a>
    <span>商城/合作</span>
    <span>STORE</span>
    </a>
    <a>
    <span>社区互动</span>
    <span>COMMUNITY</span>
    </a>
    <a href="https://lpl.qq.com/" target="_blank">
    <span>赛事官网</span>
    <span>ESPORTS</span>
    </a>
    <a>
    <span>自助系统</span>
    <span>SYSTEM</span>
    </a>
    </nav>
    <!-- 按钮组 -->
    <div class="head-search" title="搜索">
    <span class="search-cancel"></span>
    <input type="text" value="搜索lol.qq.com">
    </div>
    <a href="https://lol.qq.com/app/index.html" class="head-weixin" target="_blank">
    <div class="wx-detail">
    <img src="images/zm-qrcode.jpg">
    <p>扫码下载掌上英雄联盟</p>
    <img src="images/polo.gif">
    </div>
    </a>
    <!-- 个人中心 -->
    <div class="head-person">
    <div class="person-base">
    <a href="https://lol.qq.com/space/index.shtml" class="base-logo" target="_blank">
    <img src="images/default.png" >
    </a>
    <span>
    亲爱的召唤师,欢迎<a href="#">登录</a>
    </span>
    </div>
    <div class="person-detail">
    <div class="detail-text">
    <p>登录并且绑定大区后才可以查看您的具体信息哦<br/>
    (包括战绩、资产、声望)
    </p>
    <p>官网个人信息显示略有延迟,请以游戏数据为准</p>
    </div>
    <a class="detail-more" href="https://lol.qq.com/space/index.shtml" target="_blank">
    进入个人中心
    <i class="common-more"></i>
    </a>
    </div>
    </div>
    </div>
    <!-- 顶部遮罩层 -->
    <div class="common-head-mask">

    </div>
    <!-- 作者区域 -->
    <div class="author-box">
    <span>当前游戏版本</span>
    <span>Ver 12.15</span>
    <a href="https://lol.qq.com/gicp/news/410/37008396.html" target="_blank">版本详情</a>
    </div>
    <!-- 背景按钮 -->
    <a href="https://lol.qq.com/act/a20220715starguardianpass/index.html?_code=507041" target="_blank" class="background-btn">
    查看详情
    </a>
    <!-- 导航详情 -->
    <div class="nav-detail">
    <ul class="detail-con">
    <li>
    <a href="https://lol.qq.com/download.shtml?ADTAG=innercop.lol.web.top" target="_blank">游戏下载</a>
    <a href="https://lol.qq.com/data/newbie-what.shtml" target="_blank">新手指引</a>
    <a href="https://101.qq.com/#/page-index/tab-index" target="_blank">资料库</a>
    <a href="https://lol.qq.com/tft/" target="_blank">
    <i class="icon-new"></i>
    云顶之弈
    </a>
    <a href="https://101.qq.com/" target="_blank">
    <i class="icon-new"></i>
    攻略中心
    </a>
    <a href="https://lol.qq.com/nexus/pc/" target="_blank">开发者基地</a>
    <a href="https://lol.qq.com/act/a20171205hextech/" target="_blank">海克斯战利品库</a>
    <a href="https://yz.lol.qq.com/" target="_blank">英雄联盟宇宙</a>
    </li>
    <li>
    <a href="https://lol.qq.com/comm-htdocs/pay/new_index.htm?t=lol" target="_blank">点券充值</a>
    <a href="https://daoju.qq.com/lol/" target="_blank">
    <i class="icon-hot"></i>
    道聚城
    </a>
    <a href="https://lolriotmall.qq.com/index.shtml?ADTAG=lol.rk.gw.top&adunionsid=gwtop" target="_blank">周边商城</a>
    <a href="https://lol.qq.com/act/a20161011mvm/index.htm" target="_blank">LOL桌游</a>
    <a href="https://cafe.qq.com/tpl/lol/index.html" target="_blank">网吧特权</a>
    <a href="https://lol.qq.com/act/a20181124novel/?ADTAG=innercop.lol.web.top" target="_blank">电竞小说</a>
    </li>
    <li>
    <a href="https://lol.qq.com/v/v2/index.shtml" target="_blank">视频中心</a>
    <a href="https://lol.qq.com/act/a20160425wxlol/" target="_blank">官方微信</a>
    <a href="https://weibo.com/lol" target="_blank">官方微博</a>
    <a href="https://tr.lol.qq.com/" target="_blank">玩家创作馆</a>
    <a href="https://lol.qq.com/act/a20180418yxny/" target="_blank">玩家服务</a>
    <a href="https://lol.qq.com/act/a20200319clash/index.html?e_code=458230" target="_blank">
    <i class="icon-new"></i>
    LOL组队专区
    </a>
    <a href="https://lol.qq.com/author/#/homepage" target="_blank">
    <i class="icon-new"></i>
    作者入驻计划
    </a>
    <a href="https://lol.icreate.qq.com/v3" target="_blank">
    <i class="icon-new"></i>
    英雄联盟素材库
    </a>
    </li>
    <li>
    <a href="https://lpl.qq.com/es/msi/2022/" target="_blank">
    <i class="icon-hot"></i>
    季中冠军赛
    </a>
    <a href="https://lpl.qq.com/es/lpl/2022/" target="_blank">
    <i class="icon-hot"></i>
    LPL职业联赛
    </a>
    <a href="https://lpl.qq.com/es/ldl/2022/" target="_blank">LDL发展联赛</a>
    <a href="https://lpl.qq.com/es/worlds/2021/" target="_blank">全球总决赛</a>
    <a href="https://lpl.qq.com/act/a20220322city/" target="_blank">城市英雄争霸赛</a>
    <a href="https://lpl.qq.com/act/a20211206demacia/index.html" target="_blank">德玛西亚杯</a>
    <a href="https://lpl.qq.com/act/a20210928lcl/index.html" target="_blank">全国高校联赛</a>
    <a href="https://lpl.qq.com/es/toc3" target="_blank">
    <i class="icon-new"></i>
    云顶之弈公开赛
    </a>
    </li>
    <li>
    <a href="https://lol.qq.com/act/a20210625icon/index.html" target="_blank">
    <i class="icon-hot"></i>
    图标自助领取
    </a>
    <a href="https://lol.qq.com/act/a20200710transferzone/index.html" target="_blank">
    <i class="icon-new"></i>
    转区系统
    </a>
    <a href="javascript:void(0)">
    <i class="icon-hot"></i>
    封号查询
    <span style="display:none;">
    <img src="./images/qr-fhcx.png" alt="封号查询">
    <span>请前往“腾讯游戏安全中心”公众号-自助服务进行处罚查询</span>
    </span>
    </a>

    <a href="https://lol.qq.com/act/a20200227logout/" target="_blank">账号注销</a>
    <a href="https://lol.qq.com/act/a20190528lolscore/" target="_blank">
    <i class="icon-hot"></i>
    信誉分系统
    </a>
    <a href="https://lol.qq.com/act/a20150326dqpd/" target="_blank">服务器状态查询</a>
    <a href="https://lol.qq.com/act/a20171108ambient/index.html" target="_blank">秩序殿堂</a>
    <a href="https://lol.qq.com/act/a20191210super/index.shtml" target="_blank">峡谷之巅</a>
    </li>

    </ul>
    </div>
    </header>
    <!-- 头部区域结束 -->

    <script src="js/main.min.js"></script>
    <!-- 导入js入口文件 -->
    <script type="module" src="js/index.js"></script>
    </body>
    </html>

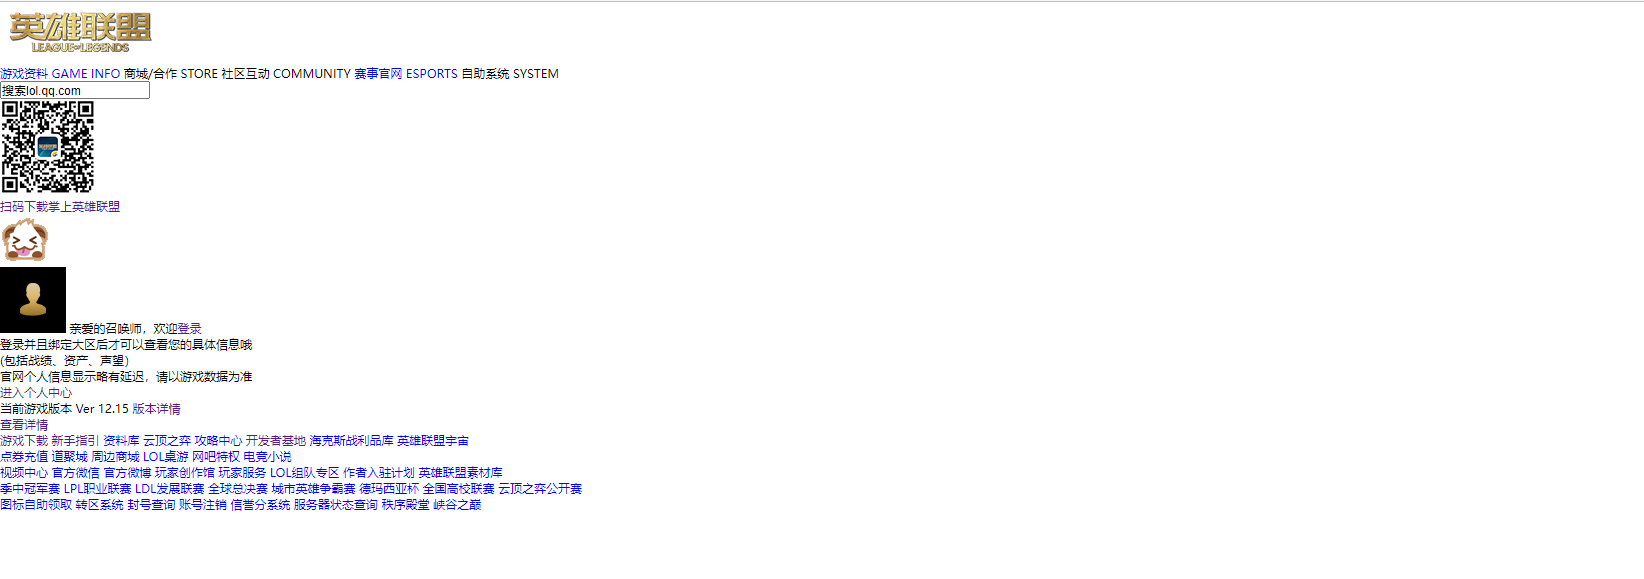
    效果:

    image-20220812063412015

  • 写结构心得:

    • 先写大结构,再写小结构,从外到内,将看到的页面内容,用合适的标签元素表达出来
    • 鼠标悬停出来的结构,和悬停对象作为整体,写在一个结构中
    • 可以同时定义类名,尽量语义化(熟练了的话,这一步直接就可以用预先定义好的类名,同时写样式和布局,如:<div class="bg-red font-16 col-8"
  • 从外到内,先写大结构

  • 元素自身样式,可按以下顺序一一书写

    • 先固定好元素整体大框架:元素的位置以及布局
      • 控制显示与隐藏
      • 控制位置
        • display的类型
          • 考虑子元素的布局,要不要用flex
        • 考虑要不要用到position属性
    • 再控制大小
      • 基于盒子模型顺序书写:
        • 宽高、内边距、边框、外边距
        • 背景图
    • 最后完善细节:
      • 字体相关:字体大小、颜色等

头部整体

.head-box

1
2
3
4
5
6
7
8
9
// 头部样式

.head-box {
position: relative;
height: 360px;
background-image: url('../images/top_banner.jpeg');
background-size: cover;
overflow: hidden;
}

image-20220813071717509

然后接着head-box后面,加上前缀继续写样式(css写法),从性能角度来讲,前缀越短性能越好,因为浏览器渲染css时,选择器渲染顺序是从右到左,前缀越长,浏览器识别解析的东西就越多

但是呢,实际我们还不能忽略前缀问题,否则很容易出现样式冲突的问题,只能是尽可能减少

.head-box .comm-head .head-logo {}这种方式写法上有点麻烦,我们可以用less、saas等预处理器的嵌套语法

1
2
3
4
5
6
7
8
9
10
11
12
13
14
15
// 头部样式

.head-box {
position: relative;
height: 360px;
background-image: url('../images/top_banner.jpeg');
background-size: cover;
overflow: hidden;
.comm-head {

.head-logo {

}
}
}

编译后的结果,是带有前缀的

新手写样式,通常是看到哪儿写到哪,该方式有助于学习

高手写样式,一开始是不会直接去写具体模块的样式,会先把整个页面的所有情况看完了,之后脑子里形成了雏形:这一块样式是公共的,这一块样式应该怎么写等等。然后先把公共的样式写了,写完后再写具体模块的样式,遇到已经写过的公共样式时,直接写个类名就好

如:

common.less

1
2
3
4
.w1300 {
width: 1300px;
margin: 0 auto;
}

head-box指定类名

1
2
3
<div class="common-head w1300">

</div>

目前我们可能达不到这种效果,介于两者之前,先一步一步写,然后遇到可以抽离成公共写样式的就抽离

工程化开发时,一般会有基础样式库,自建库或第三方库,如Tailwind.css,演示网址:https://www.tailwindcss.cn/

父子元素嵌套的场景下

  • 父元素不指定高度,可以子元素指定高度撑开父元素
  • 子元素不指定高度,父元素指定高度,而子元素高度设置100%

这里我们再给common-head设置固定的高度撑开父元素

1
2
3
4
5
6
.common-head {
height: 78px;
.head-logo {

}
}

同时给遮罩层也设置高度,并设置渐变背景图片,同时抽离出公共样式

注意遮罩的层级要低一点

  • 如果不给元素设置定位,设置层级是没有用的
  • 设是common-headrelative定位
1
2
3
4
5
6
7
8
9
10
11
12
13
14
15
16
17
18
19
20
21
22
23
24
25
26
27
// 头部样式

.head-box {
position: relative;
height: 360px;
background-image: url('../images/top_banner.jpeg');
background-size: cover;
overflow: hidden;
.common-head,
.common-head-mask {
height: 78px;
}
.common-head-mask {
position: absolute;
top: 0;
left: 0;
width: 100%;
background: url('../images/dark-jianbian-repeatx-0.png') repeat-x;
background-size: 1px 100%;
z-index: 10;
}
.common-head {
position: relative;
z-index: 11;
}
}

现在要水平排列head-box里的元素,这里用float实现,在此之前给head-box添加clearfix样式类(在reset.min.css中)清除子元素浮动给父元素带来的影响(子元素浮动脱离文档流,如果父元素没有设置高度,则父元素无法被子元素撑开)

1
2
3
<header class="head-box clearfix">

</header>

设置浮动

1
2
3
4
5
6
7
8
9
10
11
12
13
14
15
16
17
.common-head {
position: relative;
z-index: 11;
.head-logo,
.head-nav,
.head-search,
.head-weixin,
.head-person {
float: left;
padding-top: 10px;
}
.head-search,
.head-weixin,
.head-person {
float: right;
}
}

调整.head-search, .head-weixin, .head-person的结构顺序,这三个设置右浮动后,head-search跑到了最右边,html结构中和head-person换一下位置

头部图标

head-logo样式

1
2
3
4
5
6
7
8
9
// LOGO
.head-logo {
width: 167px;
height: 60px;
img {
width: 100%;
height: 100%;
}
}

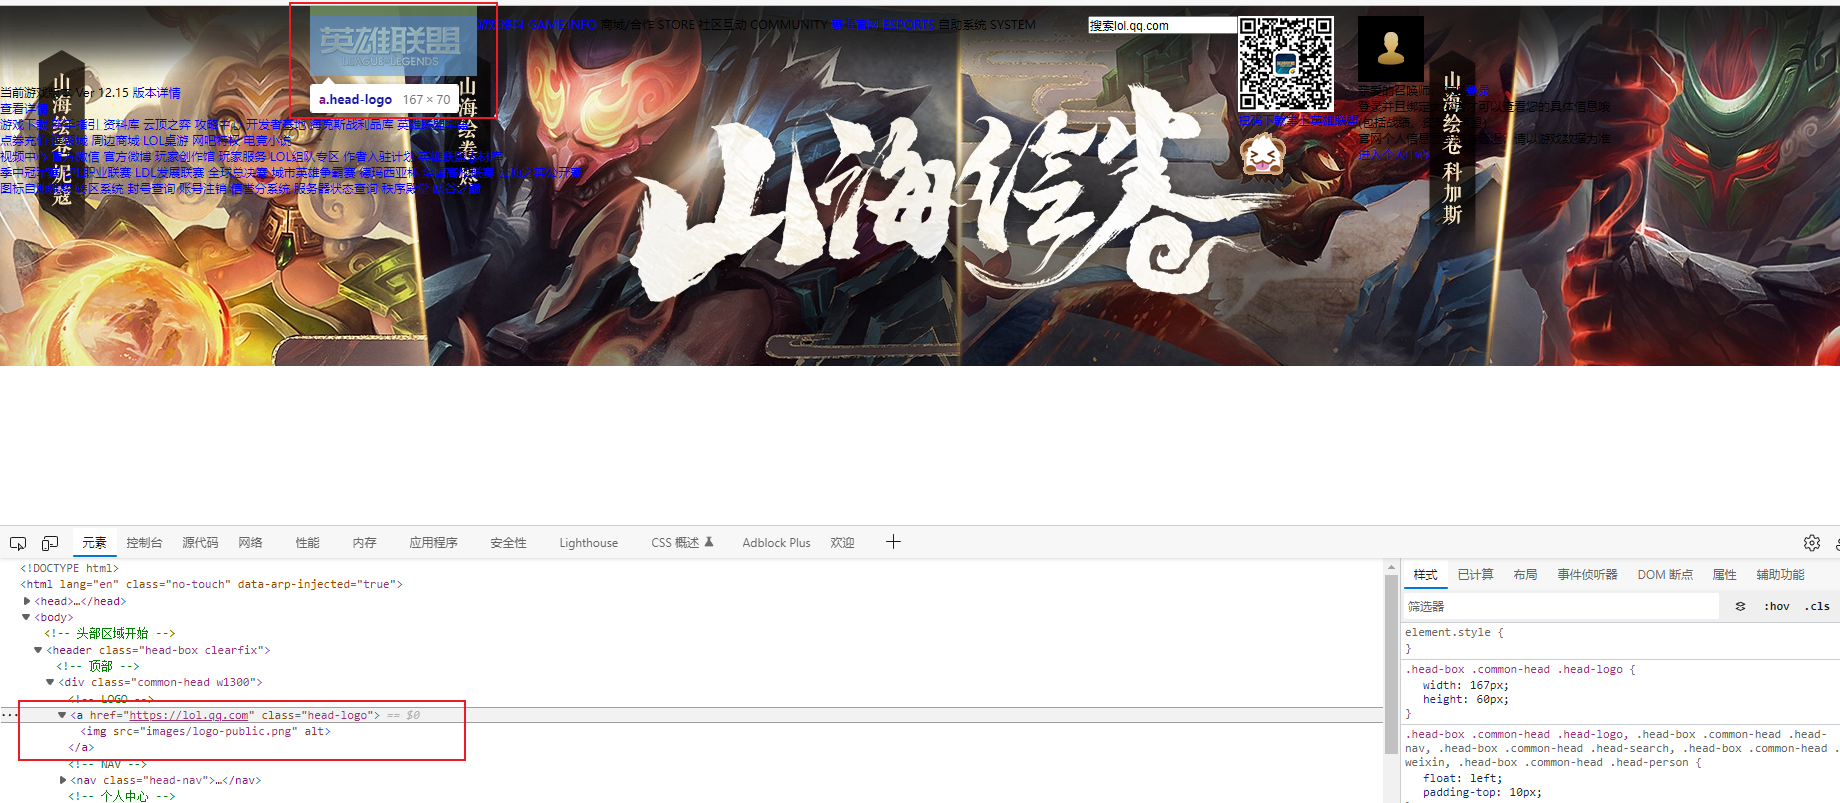
将所有的img元素设置为块级元素,写到common.less

1
2
3
img {
display: block;
}

image-20220815063622515

img元素添加alt="英雄联盟",利于seo

头部导航

head-nav样式

在全局将所有盒子的盒子模型属性设置成border-box,这样设置宽高时,包含了paddingborder

common.less

1
2
3
* {
box-sizing: border-box;
}
1
2
3
4
5
6
// head-nav
.head-nav {
height: 100%;
padding-top: 15px;
margin-left: 20px;
}

head-nav里面元素的大结构,也是同一行排列,这里我们用flex布局

head-nav的每个子元素a添加item类名,添加nav-titlenav-subtitle类名

1
2
3
4
5
6
7
8
9
10
11
12
13
14
15
16
17
18
19
20
21
22
<nav class="head-nav">
<a href="https://101.qq.com/#/hero" target="_blank" class="item">
<span>游戏资料</span>
<span>GAME INFO</span>
</a>
<a class="item">
<span>商城/合作</span>
<span>STORE</span>
</a>
<a class="item">
<span>社区互动</span>
<span>COMMUNITY</span>
</a>
<a href="https://lpl.qq.com/" target="_blank" class="item">
<span>赛事官网</span>
<span>ESPORTS</span>
</a>
<a class="item">
<span>自助系统</span>
<span>SYSTEM</span>
</a>
</nav>
1
2
3
4
5
6
7
8
9
10
11
12
// head-nav
.head-nav {
display: flex;
justify-content: flex-start;
height: 100%;
padding-top: 15px;
margin-left: 20px;
.item {
width: 140px;
height: 100%;
}
}

再设置每个item里的大标题和小标题

1
2
3
4
5
6
7
8
9
10
11
12
13
14
15
16
17
18
19
.item {
width: 140px;
height: 100%;
.nav-title, .nav-subtitle {
display: block;
color: #fff;
text-align: center;
letter-spacing: 1px;
}
.nav-title {
font-size: 18px;
line-height: 28px;
}
.nav-subtitle {
color: #aeaeae;
font-size: 12px;
line-height: 18px;
}
}

效果:

image-20220815142629174

导航详情

页面样式

head-nav添加悬浮显示效果

编写nav-detail样式

  • 通栏、半透明背景
  • 每一栏的样式
  • ul.deail-con也添加w1300类,保证和head-box垂直对齐
  • 距离左侧和顶部一定的空间,保证对齐
  • 每个li水平排列,宽度和head-box的每个nav保持一致
  • 图标用雪碧图,封装成公共样式,在所有用到图标的地方,添加公共样式类,然后利用background-position定位到指定的图标上,可以先用截图工具量个大概,再在调试工具中精确调整
  • 利用vertical-align设置图标和文字基于中线对齐(看情况调整)
  • 最开始整个区域是不显示的

index.html

1
2
<ul class="detail-con w1300">
</ul>

common.less

1
2
3
4
.sp-top {
background: url('../images/topfoot-spr.png') no-repeat;
background-size: 405px 178px;
}

给所有要加图标的地方,加上样式类

1
<i class="icon-new sp-top"></i>

head_box.less

1
2
3
4
5
6
7
8
9
10
11
12
13
14
15
16
17
18
19
20
21
22
23
24
25
26
27
28
29
30
31
32
33
34
35
36
37
38
39
40
41
42
43
// 导航详情
.nav-detail {
display: none; // 最后加上
position: absolute;
top: 0;
left: 0;
z-index: 9;
width: 100%;
height: 100%;
background: rgba(0,0,0,.7);
.detail-con {
display: flex;
justify-content: flex-start;
padding-left: 187px;
padding-top: 78px;
li {
width: 140px;
a {
display: block;
line-height: 30px;
text-align: center;
color: #fff;
font-size: 14px;
// 相当于a:hover
&:hover {
color: #e9c06c;
}
i {
display: inline-block;
width: 14px;
height: 14px;
vertical-align: middle;
&.icon-hot { //相当于i.icon-hot,表示连接符
background-position: -347px -84px; // 需要测量,或者UI给定好值
}
&.icon-new {
background-position: -381px -65px;
}
}
}
}
}
}

image-20220815151016269

js部分

  • 需求:

    • 鼠标滑到nav时显示详情,同时附带动画效果

    • 鼠标放在详情上时,也不消失

    • 除此之外,详情消失

  • css想要实现这样的效果,必须保证显示的内容是hover元素的子元素,在结构上有限制

  • head-navhead-detail不是嵌套关系,这种需求要实现,只有一种方案:事件委托

    • 浏览器事件冒泡传播机制:子元素的点击事件被触发了,其父元素、祖先元素、document元素(一层层往上)的点击事件也都会被触发
    • 事件对象:表示当前事件操作的信息,其中target值是事件源,表示真正触发事件的那个元素
    • 事件委托:给上层元素绑定事件,通过事件对象的target不同,来进行不同的处理,不用每个元素都处理

index.js

1
2
import './head_box.js';

head_box.js

1
2
3
4
5
6
7
8
9
10
11
12
13
14
15
16
17
18
19
20
21
22
23
24
25
26
27
28
29
30
31
32
33
34
35
36
37
38
39
40
41
42
// 基于事件委托实现导航详情的控制
let headBox = document.querySelector('#head-box'), // 通过id获取head-box容器
navDetail = headBox.querySelector('.nav-detail'),
headNav = headBox.querySelector('.head-nav')
// 用dom2级事件绑定(addEventListener),允许给同一个元素同一个事件行为绑定多个不同的方法
// dom0级事件绑定(onclick),只允许给同一个元素同一个事件行为绑定一个方法,绑定第二个方法会覆盖掉第一个

// 给外层元素添加事件,不能用mouseenter,因为其不存在事件冒泡机制,也就不能做事件委托
// 鼠标只要划过document里任何一个元素上,通过事件传播机制,都会触发document的mouseover行为
// 触发mouseover行为时,浏览器会帮我们把function执行,并且可以接受到事件对象
// 注意,这样实时触发事件,并不会对性能有影响;因为即使不写这些,划过每个元素,仍然都会触发每个元素的mouseover事件,仍然会触发document的事件,事件行为是天生就存在的,不管写不写代码,事件行为天生就会触发,只不过啥事不干而已;现在我们只是监听事件行为之后,让它干了点事情;并不会对性能有太大的影响;而且不需要做防抖和节流,只有频繁触发才需要做

// 获得所有的祖先元素
const getAncestors = function getAncestors(element) {
// 一直找父元素,直到找不到父元素 document.parent = null
let arr = [element]
parent = element.parentNode
while (parent) {
arr.push(parent) // 不用unshift,每次都要调索引
parent = parent.parentNode
}
return arr
}

document.addEventListener('mouseover', function (ev) {
let target = ev.target, // 获取到事件源
ancestors = getAncestors(target)
// 对事件源判断,进行逻辑处理
// console.log(target) // 拿到的事件源,可能是head-nav里的任意子元素,所以要获取当前事件源所有的祖先元素
// 两次通过js获取到的dom元素对象,虽然也是堆内存,但两次获取的结果是相等的

// 事件源是头部导航
if(ancestors.indexOf(headNav) > -1) {
navDetail.style.display = 'block'
return
}
// 事件源是详情
if(ancestors.indexOf(navDetail) > -1) return

// 其他事件源
navDetail.style.display = 'none'
})

动画处理

  • transition:修改样式就按动画轨迹处理

    head_box.less

    1
    2
    3
    4
      .nav-detail {
    // 新增
    transform: translateY(-10px);
    transition: transform 0.2s;

    head_box.js

    1
    2
    3
    4
    5
    if(ancestors.indexOf(headNav) > -1) {
    navDetail.style.display = 'block'
    navDetail.style.transform = 'translateY(0px)'; //这两个样式是会一起渲染,从none变成block的时候,动画已经结束了
    return
    }

    但并没有生效

    当代浏览器有个渲染队列机制,会先把所有和修改样式的地方,收集到队列中统一渲染,减少dom的回流和重绘;

    可以在是收集过程中,通过获取元素的某个属性,来刷新渲染机制

    1
    2
    3
    4
    5
    6
    7
    8
    9
    10
    11
    12
    13
    14
    15
    16
    17
    18
    19
    20
    21
    22
    document.addEventListener('mouseover', function (ev) {
    let target = ev.target, // 获取到事件源
    ancestors = getAncestors(target)
    // 对事件源判断,进行逻辑处理
    // console.log(target) // 拿到的事件源,可能是head-nav里的任意子元素,所以要获取当前事件源所有的祖先元素
    // 两次通过js获取到的dom元素对象,虽然也是堆内存,但两次获取的结果是相等的

    // 事件源是头部导航
    if(ancestors.indexOf(headNav) > -1) {
    navDetail.style.display = 'block'
    navDetail.offsetWidth // 刷新浏览器的渲染队列机制,不用定时器
    navDetail.style.transform = 'translateY(0px)';
    return
    }
    // 事件源是详情
    if(ancestors.indexOf(navDetail) > -1) return

    // 其他事件源
    navDetail.style.display = 'none'
    navDetail.offsetWidth // 刷新浏览器的渲染队列机制,不用定时器
    navDetail.style.transform = 'translateY(-10px)';
    })
  • animation

    也可以不用transform

    head_box.css

    .head-detail同级定义动画

    1
    2
    3
    4
    5
    6
    7
    8
    @keyframes headMove {
    0% {
    transform: translateY(-10px);
    }
    100% {
    transform: translateY(0px);
    }
    }

    head_box.js

    1
    2
    3
    4
    5
    6
    7
    8
    9
    10
    11
    12
    13
    14
    15
    16
    17
    18
    19
    20
    21
    22
    23
    24
    document.addEventListener('mouseover', function (ev) {
    let target = ev.target, // 获取到事件源
    ancestors = getAncestors(target)
    // 对事件源判断,进行逻辑处理
    // console.log(target) // 拿到的事件源,可能是head-nav里的任意子元素,所以要获取当前事件源所有的祖先元素
    // 两次通过js获取到的dom元素对象,虽然也是堆内存,但两次获取的结果是相等的

    // 事件源是头部导航
    if(ancestors.indexOf(headNav) > -1) {
    navDetail.style.display = 'block'
    // navDetail.offsetWidth // 刷新浏览器的渲染队列机制,不用定时器
    // navDetail.style.transform = 'translateY(0px)';
    navDetail.style.animation = 'headMove .2s both'
    return
    }
    // 事件源是详情
    if(ancestors.indexOf(navDetail) > -1) return

    // 其他事件源
    navDetail.style.display = 'none'
    // navDetail.offsetWidth // 刷新浏览器的渲染队列机制,不用定时器
    // navDetail.style.transform = 'translateY(-10px)';
    navDetail.style.animation = 'none'
    })

    使用animation动画就不用处理浏览器渲染队列机制导致的问题了

背景按钮

  • 查看详情是用的精灵图

  • 水平居中,可以先在公共样式类预设类名

  • 给对应的元素添加背景图、水平居中的类名,同时删除元素中的文字

    common.less

    1
    2
    3
    4
    5
    6
    7
    8
    9
    10
    11
    .center-x {
    position: absolute;
    left: 50%;
    transform: translateX(-50%);
    }
    .center-y {
    position: absolute;
    top: 50%;
    transform: translateY(-50%);
    }

    head_box.less

    1
    2
    3
    4
    5
    6
    7
    // 背景按钮
    .background-btn {
    bottom: 32px;
    width: 160px;
    height: 40px;
    background-position: -216px -39px;
    }

    index.html

    1
    2
    3
    4
    <!-- 背景按钮 -->
    <a href="https://lol.qq.com/act/a20220715starguardianpass/index.html?_code=507041" target="_blank"
    class="background-btn sp-top center-x">
    </a>

加上作者区域的布局需求

  • 能够同一行展示

  • 标签整体靠右(文字整体靠右用text-align

  • 想让标签既能够同行排列,也能够设置宽高,也能够当作文字做一些处理

  • 基于以上需求,可以用inline-block布局方式

    index.html

    1
    2
    3
    4
    5
    6
    <!-- 作者区域 -->
    <div class="author-box w1300">
    <span>当前游戏版本</span>
    <span>Ver 12.15</span>
    <a href="https://lol.qq.com/gicp/news/410/37008396.html" target="_blank" class="author-link">版本详情</a>
    </div>

    head_box.less

    backgroun-btn同级

    1
    2
    3
    4
    5
    6
    7
    8
    9
    10
    11
    12
    13
    14
    15
    16
    17
    18
    19
    20
    21
    22
    23
    24
    25
    26
    27
    // 作者区域
    .author-box {
    margin-top: 223px;
    text-align: right;
    //font-size: 0;
    span, .author-link {
    display: inline-block;
    margin: 0 5px;
    vertical-align: middle;
    }
    span {
    color: #888787;
    font-size: 14px;
    &:nth-of-type(2) {
    color: #f5d185;
    }
    }
    .author-link {
    padding: 0 15px;
    height: 22px;
    line-height: 20px;
    color: #f5d185;
    font-size: 12px;
    border: 1px solid #f5d185;
    background: rgba(0,0,0,0.7);
    }
    }

    效果:

    image-20220816101811993

按钮组

  • 箭头动画去查animate.css动画库

common.less

1
2
3
4
5
6
7
8
9
10
11
12
13
14
15
16
17
18
19
20
21
22
23
24
25
26
27
28
29
30
31
32
33
34
35
36
37
38
39
.sp-comm {
background: url("../images/comm-spr.png") no-repeat;
background-size: 393px 200px;
}
//更多按钮箭头处理
.comm-more-arrow {
display: inline-block;
margin-left: 5px;
width: 15px;
height: 15px;
.sp-comm;
background-position: -213px -126px;
&.move {
animation: commMoreArrowMove 3s infinite;
}
// 需要实现的动画
@keyframes commMoreArrowMove {

from,
to {
transform: translate3d(0, 0, 0);
}

10%,
30%,
50%,
70%,
90% {
transform: translate3d(-10px, 0, 0);
}

20%,
40%,
60%,
80% {
transform: translate3d(10px, 0, 0);
}
}
}

index.html

1
2
3
4
5
6
7
8
9
10
11
12
13
14
15
16
17
18
19
20
21
22
23
24
25
26
27
28
29
30
31
32
33
34
35
36
37
<!-- 按钮组 -->
<!-- 个人中心 -->
<div class="head-person">
<div class="person-base">
<a href="https://lol.qq.com/space/index.shtml" class="base-logo sp-top" target="_blank">
<img src="images/default.png">
</a>
<span class="base-text">
亲爱的召唤师,欢迎<a href="#" class="login">登录</a>
</span>
</div>
<div class="person-detail">
<div class="detail-text">
<p>登录并且绑定大区后才可以查看您的具体信息哦<br/>
(包括战绩、资产、声望)
</p>
<p>官网个人信息显示略有延迟,请以游戏数据为准</p>
</div>
<a class="detail-more" href="https://lol.qq.com/space/index.shtml" target="_blank">
进入个人中心
<i class="comm-more-arrow"></i>
</a>
</div>
</div>
<!--二维码-->
<a href="https://lol.qq.com/app/index.html" class="head-weixin sp-top" target="_blank">
<div class="wx-detail">
<img src="images/zm-qrcode.jpg" class="zm-qrcode">
<p>扫码下载掌上英雄联盟</p>
<img src="images/polo.gif" class="polo">
</div>
</a>
<!--搜索-->
<a class="head-search sp-top" title="搜索">
<!-- <span class="search-cancel"></span>-->
<!-- <input type="text" value="搜索lol.qq.com">-->
</a>

index.js

1
2
3
4
5
6
7
8
9
10
11
12
13
14
15
16
17
18
19
import './head_box.js';

//编写一些公共的逻辑
let commMoreArrowList = Array.from(document.querySelectorAll('.comm-more-arrow'))
commMoreArrowList.forEach(item => {
let parent = item.parentNode
if(!parent) return
parent.addEventListener('mouseenter', function () {
item.className = 'comm-more-arrow move'
// item.classList.add('move');
})
parent.addEventListener('mouseleave', function () {
item.className = 'comm-more-arrow'
// item.classList.remove('move');
})
})


head_box.less

1
2
3
4
5
6
7
8
9
10
11
12
13
14
15
16
17
18
19
20
21
22
23
24
25
26
27
28
29
30
31
32
33
34
35
36
37
38
39
40
41
42
43
44
45
46
47
48
49
50
51
52
53
54
55
56
57
58
59
60
61
62
63
64
65
66
67
68
69
70
71
72
73
74
75
76
77
78
79
80
81
82
83
84
85
86
87
88
89
90
91
92
93
94
95
96
97
98
99
100
101
102
103
104
105
106
107
108
109
110
111
112
113
114
115
116
117
118
119
120
121
122
123
124
125
126
127
128
129
130
131
132
133
134
135
136
137
138
139
140
141
142
143
144
145
146
147
148
149
150
151
152
153
154
155
156
157
// head-search
.head-search {
width: 21px;
height: 21px;
padding-top: 0;
margin-top: 25px;
margin-right: 40px;
background-position: -381px -39px;

}

// weixin
.head-weixin {
position: relative;
width: 16px;
height: 24px;
padding-top: 0;
margin-top: 25px;
margin-right: 40px;
background-position: -303px -84px;
.wx-detail {
display: none;
position: absolute;
top: 40px;
left: 50%;
width: 204px;
height: 170px;
padding-top: 10px;
margin-left: -101px;
background: rgba(0,0,0,.7);
&:before {
//position: absolute;
//left: 50%;
//transform: translateX(-50%);
.center-x;
top: -20px;
content: '';
width: 0;
height: 0;
padding: 0;
font-size: 0;
border: 10px solid transparent;
border-bottom-color: rgba(0,0,0,.7);
}

.zm-qrcode {
width: 120px;
height: 120px;
margin: 0 auto;
border: 5px solid #fff;
border-radius: 10px;
}

p {
margin-top: 10px;
text-align: center;
color: #f5d185;
font-size: 12px;
}

.polo {
position: absolute;
right: -25px;
bottom: -10px;
width: 50px;
height: 50px;
}
}

&:hover {
.wx-detail {
display: block;
animation: headMove .2s both;
}
}
}

// person
.head-person {
position: relative;
.person-base {
font-size: 0; // 不是指字体大小是0px 代码自动格式化的时候,往往会设置一些适当的缩进、换行,但当元素的display为inline或者inline-block的时候,这些缩进、换行就会产生空白,导致前端页面展示变形。
position: relative;
z-index: 11;
.base-logo,
.base-text {
display: inline-block;
vertical-align: middle;
}
.base-logo {
position: relative;
width: 48px;
height: 48px;
background-position: -216px -117px;
img {
position: absolute;
top: -4px;
left: -5px;
width: 80%;
height: 80%;
margin-top: 10px;
margin-left: 10px;
border-radius: 50%;
}
}
.base-text {
color: #fff;
font-size: 16px;
margin-left: 10px;
.login {
color: #fff3d0;
}
}
}
.person-detail {
display: none;
position: absolute;
top: 0;
left: 50%;
z-index: 10;
width: 310px;
padding-top: 78px;
margin-left: -155px;
background: rgba(0,0,0,.7);
.detail-text {
margin-top: 15px;
color: #888787;
font-size: 12px;
line-height: 20px;
text-align: center;
}
.detail-more {
position: relative;
display: block;
height: 44px;
margin-top: 20px;
background: #000;
color: #fff;
font-size: 16px;
letter-spacing: 1px;
line-height: 44px;
text-align: center;
vertical-align: middle;
.comm-more-arrow {
position: absolute;
left: 220px;
top: 18px;
}
}
}
&:hover {
.person-detail {
display: block;
animation: headMove .2s both;
}
}
}

效果:

image-20220816145613871

头部导航小结

  • hover交互效果:

    • 同级结构的可以通过事件委托,给祖先元素绑定鼠标移入移出事件,动态修改样式及动画
    • 嵌套结构,直接可以通过csshover效果实现
  • 其他动画效果:

    • 借助animate.css动画库,找到满足动画效果的css样式
  • 需要补足的点(能看懂,但写不出来,dom操作练习的少):

    • js动态操作样式
    • js操作dom、获取类名等相关dom操作
  • 通用流程

    • 先准备好物料:资源背景图、尺寸图等
    • 搭建结构,
      • 在搭建结构的时候,用什么标签心里已经有数
      • 同时,这一块的布局,字体相关样式,应该也已了然于心
      • 最好能够在搭结构的时候,就已经想好交互的解决方案
    • 对于抽取的公共模块做到心中有数
  • 常见组合拳

    • 字体相关

      1
      2
      3
      4
      5
      6
      7
      8
      9
      10
      font-size
      color
      lineheight
      letter-spacing: 1px;
      overflow: hidden;
      text-overflow: ellipsis;
      white-space: nowrap;

      text-align: center; // 父级
      vertical-align: middle; // 父级

轮播图+页卡静态页面

根据上面的流程,将首页静态页面写完

轮播+新闻模块静态页面

common.less

1
2
3
body {
background-color: #eeeeee;
}

index.html

1
2
3
4
5
6
7
8
9
10
11
12
13
14
15
16
17
18
19
20
21
22
23
24
25
26
27
28
29
30
31
32
33
34
35
36
37
38
39
40
41
42
43
44
45
46
47
48
49
50
51
52
53
54
55
56
57
58
59
60
61
62
63
64
65
66
67
68
69
70
71
72
73
74
75
76
77
<!--banner-and-news-->
<div class="banner-and-news w1300">
<!--轮播图开始-->
<div class="banner-box">
<a href="">
<img src="" alt="" class="banner-img">
</a>
<ul>
<li>小怪兽训练师</li>
<li>时空召唤</li>
<li>浪里五鲨宝典</li>
<li>LPL夏季赛</li>
<li>夏日折扣</li>
</ul>
</div>
<!--轮播图结束-->

<!--新闻开始-->
<div class="news-box">
<ul class="news-box-header">
<li>综合</li>
<li>公告</li>
<li>赛事</li>
<li>攻略</li>
<li>社区</li>
</ul>
<div class="title-header">【英雄联盟】星之守护者 - 年刊</div>
<ul class="news-title">
<li>
<span class="item-category">
<span>新闻</span>
</span>
<a class="item-tite">巨龙之境亚洲洲际赛即将开赛</a>
<span class="item-time">08-14</span>
</li>
<li>
<span class="item-category">
<span>新闻</span>
</span>
<a class="item-tite">聊聊英雄联盟:2023季前赛打野变动</a>
<span class="item-time">08-12</span>
</li>
<li>
<span class="item-category">
<span>视频</span>
</span>
<a class="item-tite">【英雄联盟】聊聊英雄联盟:英雄和2023 季前赛</a>
<span class="item-time">08-12</span>
</li>
<li>
<span class="item-category">
<span>新闻</span>
</span>
<a class="item-tite">云顶之弈TOC4龙神杯赛事一图流</a>
<span class="item-time">08-12</span>
</li>
<li>
<span class="item-category">
<span>公告</span>
</span>
<a class="item-tite">小怪兽训练师系列皮肤现已上线</a>
<span class="item-time">08-10</span>
</li>
<li>
<span class="item-category">
<span>公告</span>
</span>
<a class="item-tite">12.15版本更新公告:神圣分离者&先攻削弱,小怪兽训练师皮肤上线</a>
<span class="item-time">08-10</span>
</li>
</ul>
<a href="" class="news-footer">
<span class="text">阅读更多<span class="more-news">最新资讯</span><i class="comm-more-arrow"></i></span>
</a>
</div>
<!--新闻结束-->
</div>

index.less

1
@import './banner_and_box.less';

banner_and_box.less

1
2
3
4
5
6
7
8
9
10
11
12
13
14
15
16
17
18
19
20
21
22
23
24
25
26
27
28
29
30
31
32
33
34
35
36
37
38
39
40
41
42
43
44
45
46
47
48
49
50
51
52
53
54
55
56
57
58
59
60
61
62
63
64
65
66
67
68
69
70
71
72
73
74
75
76
77
78
79
80
81
82
83
84
85
86
87
88
89
90
91
92
93
94
95
96
97
98
99
100
101
102
103
104
105
106
107
108
109
110
111
112
113
114
115
116
117
118
119
120
121
122
123
124
125
126
127
128
129
130
131
132
133
134
135
136
137
138
139
140
.banner-and-news {
padding-top: 40px;

.banner-box {
float: left;
width: 780px;
height: 380px;
background-color: peachpuff;

.banner-img {
width: 100%;
height: 340px;
}

ul {
display: flex;
list-style: none;

li {
width: calc(780px / 5);
height: 40px;
background-color: #E3E2E2;
font-size: 14px;
color: #424242;
text-align: center;
letter-spacing: 1px;
line-height: 40px;

&:hover {
background-color: #f7f6f6;
color: #ab8e66;
border-bottom: 1px solid #ab8e66;
}
}

}
}

.news-box {
position: relative;
float: right;
width: 490px;
height: 380px;
//background-color: lawngreen;
overflow: hidden;
ul.news-box-header {
display: flex;
list-style: none;
width: 570px;
height: 35px;
li {
width: 113px;
height: 37px;
border-bottom: 1px solid #d9d8d8;

font-size: 18px;
color: #424242;
letter-spacing: 1px;
text-align: left;
&:hover {
font-weight: bold;
color: #1da6ba;
}
}
}
.title-header {
height: 59px;
font-size: 22px;
font-weight: bold;
color: #1DA6BA;
line-height: 59px;
letter-spacing: 1px;
text-align: center;
vertical-align: middle;
}
ul.news-title {

li {
height: 39px;
border-top: 1px solid #d9d8d8;
display: flex;
justify-content: space-between;
vertical-align: center;
line-height: 39px;
font-size: 14px;
letter-spacing: 1px;

color: #424242;
.item-category {
width: 45px;
span {
padding: 2px 5px;
border: 0.5px solid #1DA6BA;
font-size: 12px;
color: #1DA6BA;
}

}
.item-tite {
width: 370px;
overflow: hidden;
text-overflow: ellipsis;
white-space: nowrap;
&:hover {
color: #1DA6BA;
cursor: pointer;
}
}
.item-time {
color: #9d9d9d;
}
}

}
.news-footer {
position: absolute;
bottom: 0;
display: inline-block;
width: 100%;
height: 40px;
background-color: #e3e2e2;
text-align: center;
vertical-align: middle;
.text {
font-size: 14px;
line-height: 40px;
letter-spacing: 1px;
color: #676767;
.more-news{
color: #7EA1A6;
}
.comm-more-arrow {
position: absolute;
top: 15px;
}
}
}
}

}

注意:

head-box加个下面的样式

1
2
min-width: 1300px;
width: 100%;

保证缩小窗口时,上下两栏能够始终对齐

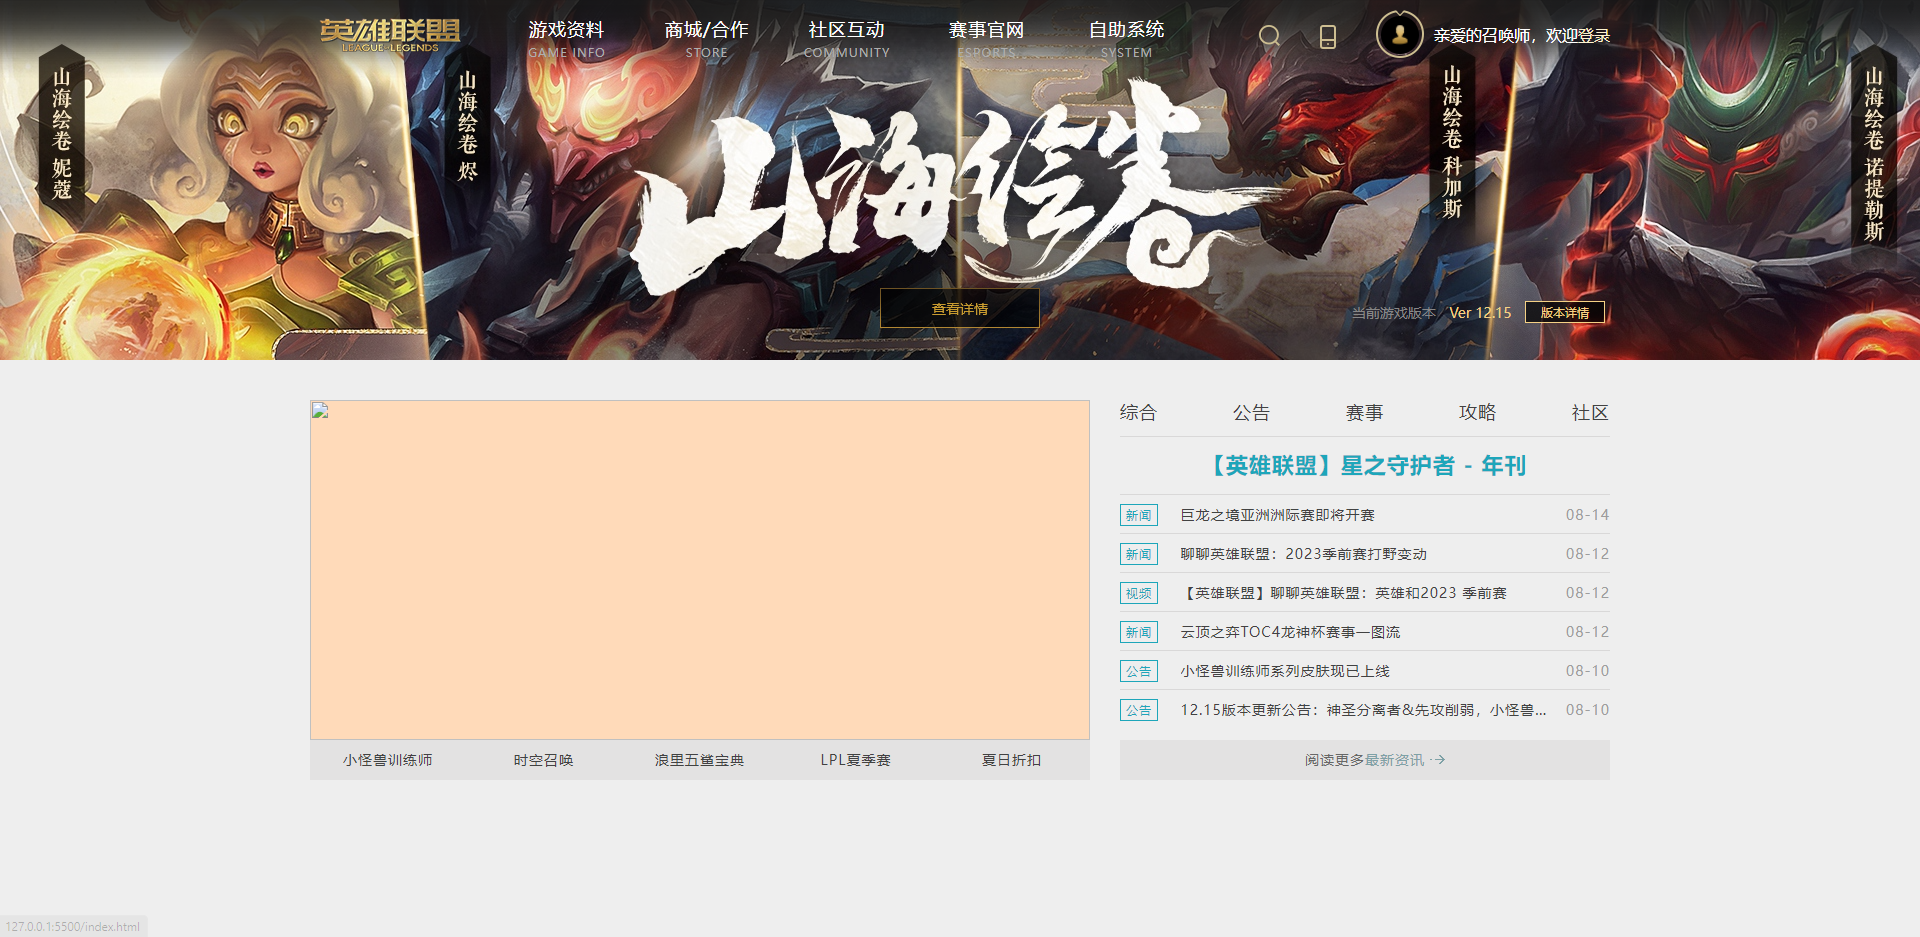
最终效果:

image-20220818202517609

轮播图模块

轮播图数据获取

轮播图的数据,需要动态获取,然后动态绑定到页面中

动态绑定之后,然后再实现轮播效果

数据不直接写死,后台数据在admin文件夹(为了练习到axios

  • Node版本>12.0.0
  • 启动:node server.js,注意不能关窗口,如果想要关闭窗口服务还在,安装npm i pm2,启动pm2 start server.js --name lol,结束pm2 stop lol,重启pm2 start lol
  • 可以学习一下,mock数据怎么简单搭建成api服务

想从服务器获得数据(前后端数据通信)

  • 同源方案
    • ajax$ajax基于回调函数、axios基于Promise,核心是XMLRequest
    • fetchES6中提供的新的方法
  • 跨域方案
    • jsonp
    • postmessage

http.js

1
2
3
4
5
6
7
8
9
10
11
12
13
14
15
16
17
18
19
20
21
22
23
24
25
26
27
28
29
30
31
32
33
34
35
36
37
38
39
40
41
42
43
44
45
46
47
48
49
50
51
52
53
54
55
56
57
58
59
60
61
62
const http = axios.create({
// 统一请求前缀
baseURL: 'http://127.0.0.1:8888',
// 是否允许跨域时候携带资源凭证
withCredentials: false,
// 请求成功的状态码校验规则
validateStatus: status => {
return status >= 200 && status < 400;
},
// 请求头统一处理「设置请求主体专递给服务器的数据格式」
headers: {
'Content-Type': 'application/x-www-form-urlencoded'
},
// POST系列请求,请求主体传递信息的格式化
transformRequest: (data, headers) => {
if (data !== null && typeof data === "object") {
const ct = headers['Content-Type'];
if (ct === "application/x-www-form-urlencoded") {
return qs.stringify(data);
}
}
return data;
}
});

// 请求拦截器:向服务器发送请求之前
http.interceptors.request.use(config => {
// ...
return config;
});

// 响应拦截器:获取到响应信息 ~ 自己处理业务逻辑之间
http.interceptors.response.use(response => {
// 获取响应主体信息
return response.data;
}, reason => {
// 失败的统一处理「一般就是做相关的提示或者其它操作」
let response = reason.response;
if (response) {
// 服务器有返回值,但是状态码不符合validateStatus校验规则
switch (response.status) {
case 400:
// ...
break;
case 401:
// ...
break;
}
} else {
// 服务器没有返回任何的信息
if (reason && reason.code === "ECONNABORTED") {
// 超时或者请求中断
}
if (!navigator.onLine) {
// 网络出现故障
}
}
return Promise.reject(reason);
});

// ES6Module中模块的导出:我想把当前模块中的某个方法,某些东西暴露出去供其他模块调用 export & export default
export default http;

新建swiper_container_home.jsindex.js中导入

index.js

1
2
import './head_box.js';
import './swiper_container_home.js' // 记得加后缀

swiper_container_home.js

1
2
3
4
5
import http from './http.js'

http.get('/home_banner').then(data => {
console.log(data)
})

结果:

image-20220818203901891

录播图和分页器的结构,只留一个。并且是根据服务器返回的数据动态创建的

swiper_container_home.js

1
2
3
4
5
6
7
8
9
10
11
12
13
14
15
16
17
18
19
20
21
22
23
24
25
26
27
28
29
30
import http from './http.js'

let swiperContainerHome = document.querySelector('#swiper-container-home'),
wrapper = swiperContainerHome.querySelector('.swiper-wrapper'),
pagenation = swiperContainerHome.querySelector('.swiper-pagenation')
console.log(wrapper)
let step = 0 // 用来记录当前展示的是哪一个图片

// 数据绑定,根据服务器中的数据,动态拼接字符串,然后放入容器中
const binding = function binding(data) {
let str_slide = ``,
str_pagenation = ``

data.forEach((item, index) => {
str_slide += `<a href="${item.href}" targe="_blank">
<img src="${item.pic}" alt="" class="banner-img" alt="${item.title}">
</a>`
str_pagenation += `<li class="${index === step ? 'active' : ''}">${item.title}</li>`
})

// 拼好后放入指定容器中
wrapper.innerHTML = str_slide
pagenation.innerHTML = str_pagenation
}

http.get('/home_banner').then(data => {
binding(data)
})


修改对应结构,index.html

1
2
3
4
5
6
7
8
9
10
11
12
13
<!--轮播图开始-->
<div class="banner-box" id="swiper-container-home">
<div class="swiper-wrapper">
<!-- <a href="">
<img src="" alt="" class="banner-img">
</a> -->
</div>
<ul class="swiper-pagenation">
<!-- <li class="active">小怪兽训练师</li> -->
</ul>
</div>
<!--轮播图结束-->

修改对应样式,banner_and_box.less

1
2
3
4
5
6
7
8
9
10
11
12
13
14
15
16
17
18
19
20
21
22
23
24
25
26
27
28
29
30
31
32
33
34
.swiper-wrapper {
overflow: hidden;
height: 340px;
.banner-img {
width: 100%;
height: 340px;
}
}

ul {
display: flex;
list-style: none;

li {
width: calc(780px / 5);
height: 40px;
background-color: #E3E2E2;
font-size: 14px;
color: #424242;
text-align: center;
letter-spacing: 1px;
line-height: 40px;

&:hover,
&.active {
background-color: #f7f6f6;
color: #ab8e66;
border-bottom: 1px solid #ab8e66;
}

}

}
}

增加图片加载时的loading效果

  • 可以是个圈圈(loading
  • 也可以是个架子(骨架屏)
  • 也可以做百分比进度条(监听ajax
    • 一般只有大文件上传的时候会处理

common.less

1
2
3
4
5
6
7
8
9
10
11
12
13
14
15
16
17
18
19
20
21
22
23
24
25
26
27
28
29
30
31
32
33
34
35
36
37
38
39
40
41
42
43
44
/* loading */
.loading {
position: absolute;
top: 0;
left: 0;
width: 100%;
height: 100%;

&:before,
&:after {
position: absolute;
top: 50%;
left: 50%;
content: '';
}

&:before {
margin: -48px 0 0 -25px;
width: 50px;
height: 50px;
background: url('../images/loading.svg') no-repeat center center;
background-size: 100% 100%;
animation: loadingMove 2s linear 0s infinite;
}

&:after {
content: '小主,奴家正在努力为您加载中...';
margin: 8px 0 0 -120px;
width: 240px;
height: 30px;
line-height: 30px;
text-align: center;
font-size: 12px;
color: #676767;
}

@keyframes loadingMove {
100% {
transform: rotate(360deg);
}
}
}


给轮播图增加loading样式类,并适当调整盒子的布局

index.html

1
2
3
4
5
6
7
8
9
10
11
<!--轮播图开始-->
<div class="banner-box loading" id="swiper-container-home">
<div class="swiper-wrapper">
<!-- <a href="">
<img src="" alt="" class="banner-img">
</a> -->
</div>
<ul class="swiper-pagenation">
<!-- <li class="active">小怪兽训练师</li> -->
</ul>
</div>

banner_and_box.less,主要是使得盒子恢复到原来的位置

1
2
3
4
5
6
7
8
9
10
11
12
13
14
15
16
17
18
19
20
21
22
23
24
25
26
27
28
29
30
31
32
33
34
35
36
37
38
39
40
41
42
43
44
45
46
47
48
49
50
51
.banner-and-news {
padding-top: 40px;
height: 420px;
position: relative;
.banner-box {
float: left;
width: 780px;
height: 380px;
top: 0px;
.swiper-wrapper {
overflow: hidden;
height: 340px;

z-index: 2; // 新增

.banner-img {
width: 100%;
height: 340px;
}
}

ul {
display: flex;
list-style: none;

z-index: 3; // 新增
position: absolute;
bottom: 0px;

li {
width: calc(780px / 5);
height: 40px;
background-color: #E3E2E2;
font-size: 14px;
color: #424242;
text-align: center;
letter-spacing: 1px;
line-height: 40px;

&:hover,
&.active {
background-color: #f7f6f6;
color: #ab8e66;
border-bottom: 1px solid #ab8e66;
}

}

}
}
}

数据绑定后,移出loading样式类

swiper_container_home.js

1
2
3
4
5
6
7
http.get('/home_banner').then(data => {
console.log(data)
binding(data)
swiperContainerHome.classList.remove('loading')
})


轮播图实现原理

调整banner-box相关样式

1
2
3
4
5
6
7
8
9
10
11
12
13
14
15
16
17
18
19
20
21
22
23
    .banner-box {
float: left;
width: 780px;
height: 380px;
// background-color: peachpuff;
top: 0px; // 修改
position: relative; // 新增
.swiper-wrapper {
// overflow: hidden;
position: absolute;
left: 0;
top: 0;
transition: left .3s;
display: flex;
// width: 3900px; // 后期需要动态计算
height: 340px;
z-index: 2;
.banner-img {
width: 100%;
height: 340px;
}
}
}

效果,这里暂时没有设置overflowhidden

需要隐藏其他图片的话,还要将swiper-wrapper的父元素宽度改成和图片一样
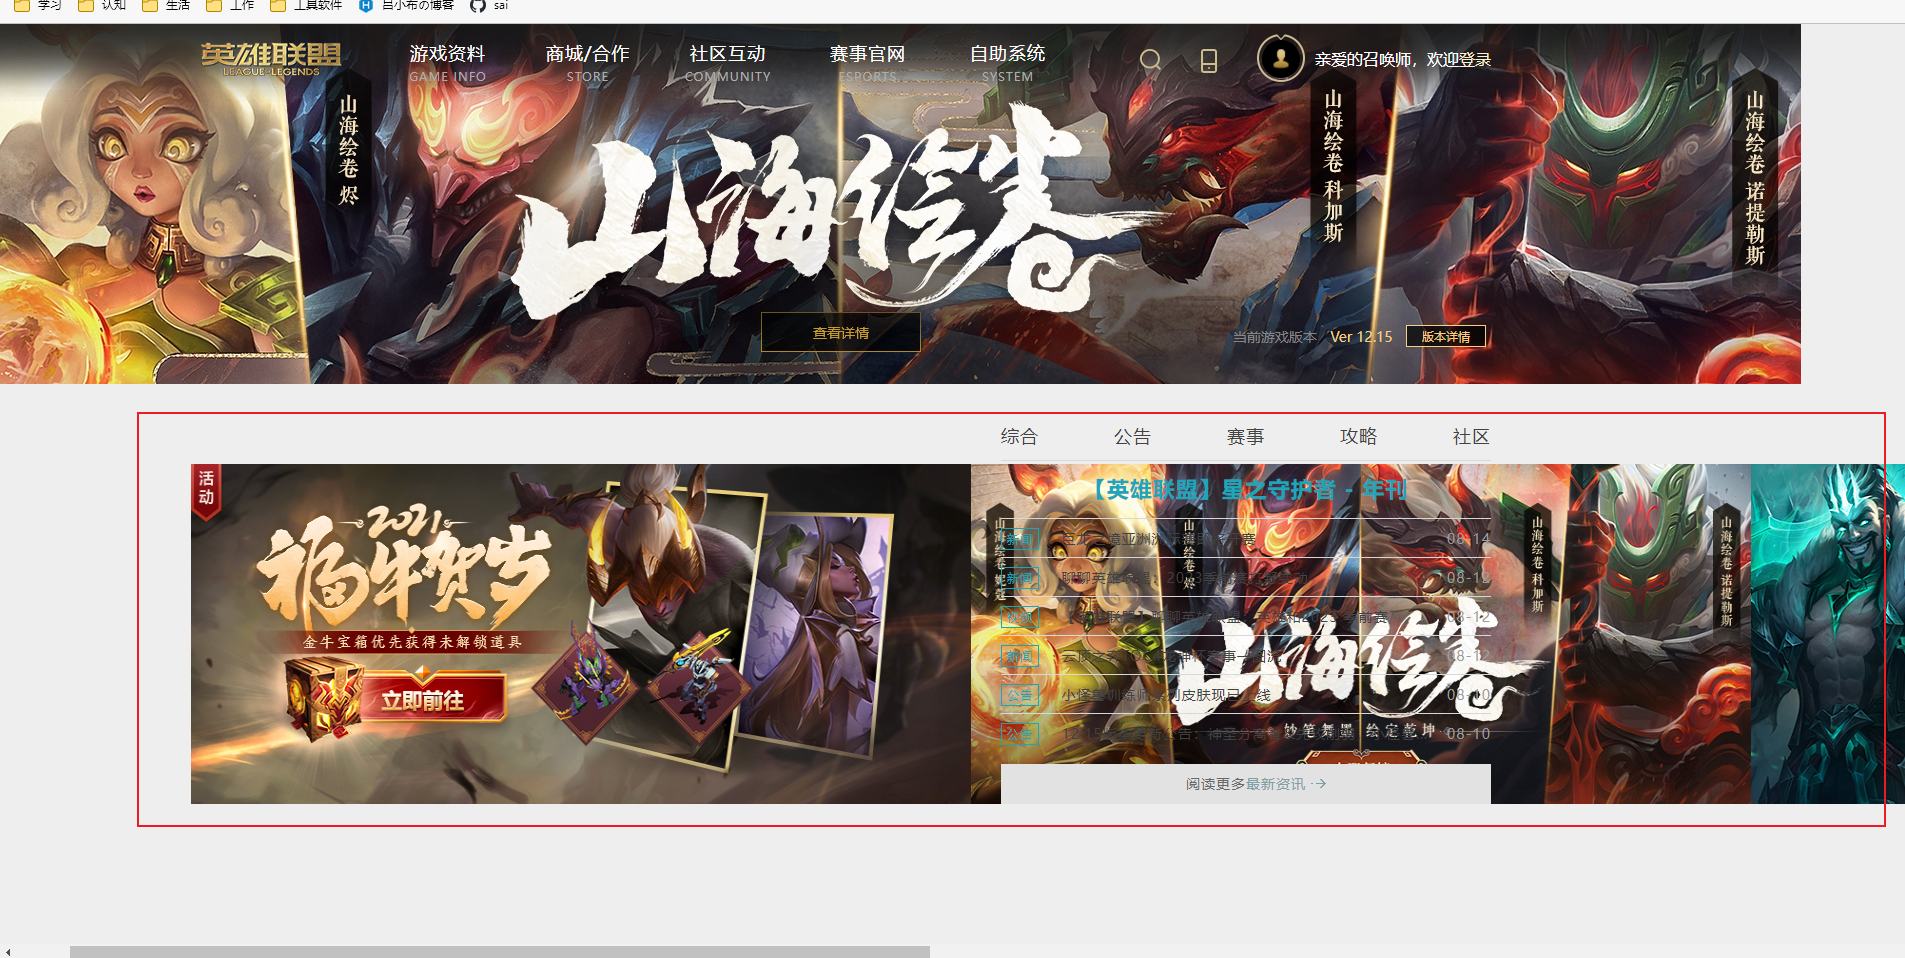
image-20220819062804479

  • 需要展示的图片排列成一行,定时控制每一张图片展示在视口中

  • 图片相对于与视口定位(调整left值)或使用transform调整translateX

    • 整个外部容器绝对定位,图片wrapper相对定位,且每张图片水平排列
      • 外部的图片容器,position: absolute,再设置外图片容器的父元素position:relative
      • 图片容器定位的初始值:left:0;top:0;
      • 给图片容器一个过渡的动画效果:transition:left .3s;
    • 容器是溢出隐藏的,只会看到一张
  • 实现无缝衔接

    • 复制第一张放在末尾,获取到data数据后,单独再拼接一次data[0]

      1
      2
      3
      4
      5
      6
      7
      8
      9
      10
      11
      12
      let first = data[0]

      // 为了实现无缝衔接,拼好后再放一张图片,克隆的部分,只克隆图片
      if (first) {
      str_slide += `<a href="${first.href}" targe="_blank">
      <img src="${first.pic}" class="banner-img" alt="${first.title}">
      </a>`

      }
      // 拼好后放入指定容器中
      wrapper.innerHTML = str_slide
      pagenation.innerHTML = str_pagenation
    • 多克隆一份之后,动态计算wrapper的宽度

      • 定义count记录每个slice图片的数量,包含克隆的哪一张
      • 主逻辑中,移除加载动画类后,计算count,值为data.length+1,可以进行边界判断,但一般来说,服务器只要返回了数据,data.length都是不为空的
      • 有了图片的总数量,wrapper的宽度就可以进行设置了:wrapper.style.width
        • 可以直接写死
        • 也可以动态获取,先获取每张图片的宽度:slideWidth = swiperContainerHome.offsetWidth,,再乘以数量:${count*slideWidth}px
        • 同时计算每次左移的值wrapper.style.left${-step*slideWidth}px
    • 需要计算的值,获取到后,在主逻辑中,开启轮播图

      • 定义运动时间interval、定时器对象autoTimer、轮播函数autoMove
      • 轮播函数autoMove
        • 自增步长step,记录图片位置
        • 判断步长和图片总数的关系,如果走到了末尾,即step >= count,让wrapper立即回到第一张,即修改left样式为0,并设置这一次的过渡动画的时间为0(注意获取下wrapper的属性,刷新下浏览器的渲染队列)
          • 最后步长归为重置为1
        • 如果没有到末尾,每次修改wrapperleft值并添加过渡时间为.3s
        • 每次切换完,实现分页器对齐
    • 到末尾后,立即调到第一张(视差感受不到),然后继续轮播第二张

      • 通过设置left实现移动
        • 第一张的left值为0
        • 每过3秒钟,step步长加一,第二张的left值为-780px
        • 第三张的索引为2,left值为-780*2px
      • 每次调用轮播的函数,记录step,通过step和图片总长度的比较来了解图片的位置
    • 整个wrapper的长度,为图片数量加一,乘以每张图片的长度

  • 主逻辑中:当鼠标滑入wrapper-container-home时,结束自动轮播;鼠标离开,开启自动轮播

    • 注意实际的dom范围
  • 实现分页器对齐

    • 定义分页器对齐函数pagenationAlign,每次轮播切换结束的最后,调用分页器对齐函数

    • 根据step的值,给对应的span添加active样式类

      • 定义pagenationList为数组,数据绑定之后,使用Array.fromquerySelectorAll获取span得到类数组转为数组(定义在开启轮播图之前)
      • 我们这里是用ul写的,将获取span修改成获取li
    • 分页器对齐函数

      • 拿到step后,存到temp临时变量中(分页器的索引,比图片的索引少一项,图片0和图片6应该都是对应分页器0)
      • 比较tempcount-1,如果相等了,表示拿到了最大索引,对应的应该是克隆的那张图片,分页器的索引应该是0
      • 循环分页器数组,比较indextemp动态添加active样式类
  • 实现分页器切换

    • 鼠标划过每个分页器的时候,也能够控制分页器切换
    • 有两种方案
      • 获取到所有的分页器,循环,每次都添加事件绑定。这种方式会产生多个闭包,性能也不太好
      • 使用事件委托,注意mouseenter是没有冒泡传播机制的,要使用mouseover
        • 基于自定义属性,获取每个分页器的索引

swiper_container_home.js

1
2
3
4
5
6
7
8
9
10
11
12
13
14
15
16
17
18
19
20
21
22
23
24
25
26
27
28
29
30
31
32
33
34
35
36
37
38
39
40
41
42
43
44
45
46
47
48
49
50
51
52
53
54
55
56
57
58
59
60
61
62
63
64
65
66
67
68
69
70
71
72
73
74
75
76
77
78
79
80
81
82
83
84
85
86
87
88
89
90
91
92
93
94
95
96
97
98
99
100
101
102
103
104
105
106
107
108
109
110
111
112
113
114
115
116
117
118
119
120
121
import http from './http.js'

let swiperContainerHome = document.querySelector('#swiper-container-home'),
wrapper = swiperContainerHome.querySelector('.swiper-wrapper'),
pagenation = swiperContainerHome.querySelector('.swiper-pagenation')

// console.log(pagenation)


let step = 0, // 用来记录当前展示的是哪一个图片
count = 0, //记录slide数量,包含克隆的那一个
slideWidth = swiperContainerHome.offsetWidth, // 记录slide宽度(每次运动的距离)
interval = 2000, // 轮播图自动运动的时间
autoTimer = null, // 记录自动轮播的定时器
pagenationList = [] // 记录分页器列表

// 数据绑定,根据服务器中的数据,动态拼接字符串,然后放入容器中
const binding = function binding(data) {
let str_slide = ``,
str_pagenation = ``,
first = data[0]
data.forEach((item, index) => {
str_slide += `<a href="${item.href}" targe="_blank">
<img src="${item.pic}" class="banner-img" alt="${item.title}">
</a>`
str_pagenation += `<li index="${index}" class="${index === step ? 'active' : ''}">${item.title}</li>`
})

// 为了实现无缝衔接,拼好后再放一张图片,克隆的部分,只克隆图片
if (first) {
str_slide += `<a href="${first.href}" targe="_blank">
<img src="${first.pic}" class="banner-img" alt="${first.title}">
</a>`
// str_pagenation += `<li class="${index === step ? 'active' : ''}">${first.title}</li>`
}
// 拼好后放入指定容器中
wrapper.innerHTML = str_slide
pagenation.innerHTML = str_pagenation
}
// 开启自动轮播
const autoMove = function autoMove() {
step++
if(step >= count ) {
// 当前处于克隆的这一张,让其立即运动到真实的第一张(视觉差),运动完之后,再让其运动到第二张(索引为1)
wrapper.style.transitionDuration = `0s` // 立即运动,就是没有动画
wrapper.style.left = `0px`
// 注意浏览的渲染队列机制,上面的样式不会立即渲染
// 刷新浏览器的渲染队列
wrapper.offsetWidth // 通过获取盒子属性,实现刷新浏览器属性
step = 1
}
wrapper.style.transitionDuration = `.3s`
wrapper.style.left = `${-step*slideWidth}px` // 控制绝对定位的left值,为负值
// 浏览器的4个样式是一起渲染的,导致后面的会覆盖掉前面的样式

//每次切换完,实现分页器对齐
pagenationAlign()
}

// 实现分页器对齐
const pagenationAlign = function pagenationAlign () {
let temp = step
temp === count-1 ? temp = 0 : null
pagenationList.forEach((item, index) => {
item.className = index === temp ? 'active' : ''
})
}

// 实现分页器切换
const pagenationHandle = function pagenationHandle () {
// 有多少分页器,就循环了多少次
// pagenationList.forEach((item, index) => {
// item.addEventListener('mouseenter', () => {
// step = index // 产生了闭包
// wrapper.style.transitionDuration = `.3s`
// wrapper.style.left = `${-step*slideWidth}px`
// pagenationAlign()
// })
// })

// 使用事件委派,委托给父元素swiper-pagenation
// 事件代理的性能,比直接循环列表绑定事件,高了40%~60%
pagenation.addEventListener('mouseover', function (ev) {
let target = ev.target,
index = +target.getAttribute('index') // 拿到的是字符串,在一个值前面加加号,就会将其转为数字

if(target.tagName === 'LI') {
// 现在要获取对应分页器的索引
// 当我们动态创建分页器的时候,一定是可以知道索引的,
// 基于自定义属性处理,在一开始拼接的时候,加上自定义属性
// 初始化的时候把索引存储起来,后期需要用到索引的时候,基于自定义属性再获取到
step = index
wrapper.style.transitionDuration = `.3s`
wrapper.style.left = `${-step*slideWidth}px`
pagenationAlign()
}
})
}

http.get('/home_banner').then(data => {
binding(data)
// 一些额外的处理

swiperContainerHome.classList.remove('loading') // 移除样式类
count = data.length + 1
wrapper.style.width = `${count*slideWidth}px`
wrapper.style.left = `${-step*slideWidth}px` // 控制绝对定位的left值,为负值
pagenationList = Array.from(pagenation.querySelectorAll('li')) // dom操作获取的是类数组,要转为数组
console.log(pagenationList)
// 开启轮播
autoTimer = setInterval(autoMove, interval)
// 控制自动轮播
swiperContainerHome.addEventListener('mouseenter', () => clearInterval(autoTimer))
swiperContainerHome.addEventListener('mouseleave', () => autoTimer = setInterval(autoMove, interval))

// 分页器切换
pagenationHandle()

})


小结

  • swiper.js源码不难,只是处理了更多的可能性,没有特别值得学习的代码思想

  • pc端的轮播图真用不上swiper,就这点代码

  • 移动端涉及到touch,自己写也可以,但有点麻烦而已

  • 上面的真没有什么难度,闭着眼睛都能写出来,真正难的是自己能够封装成一个开源级的插件。用swiper不是不可以,但它封装的东西太多了,整个项目中,就只用到了类似上面的轮播图,用swier反而得不偿失。

  • 这时候就需要自己,能够将轮播图功能封装成插件,自己写的插件,压缩完之后也就几kb大小,也支持数据绑定,功能也能实现。

  • 所以并不是所有的功能,能有第三方插件解决,就一定得用第三方插件。

    • 小公司里拿插件快速解决没问题
    • 大公司要追求极致性能体验,就需要自己能够实现插件封装
      • 要考虑哪些维度
      • 怎么实现可扩容性
      • 容错处理,让风险评估达到最低
      • 优化、面向对象的一些东西
  • 插件封装是JS高级课程里的

    • 可以学习优秀的开源框架:jQuery、Axios、PromiseA+
    • 学完优秀开源框架源码,目的是掌握背后的设计思想,自己也能造轮子。
    • 而封装轮播图插件,是自己造轮子的开胃菜,那个时候的代码就不是现在这些破玩意儿了

页卡切换

  • 鼠标划过数据能够切换
  • 有的是划过后,数据会重新加载

页卡切换常见的三大方案

  • 从服务器端获取所有的页卡内容,动态绑定到每一个内容区域中
    • 刚开始只展示第一个页卡及对应的内容(选中态),剩下的已经绑定好了,没有展示而已
    • 鼠标滑到第二个页卡,移出第一个页卡的选中态(通过控制选中态,实现页卡的显示隐藏)
  • 内容区域只有一个,滑到哪个页卡就展示哪部分的内容区域
    • 一次性获取所有页卡内容,滑过哪个页面,在内容中找出对应内容
  • 或者是,内容区域只有一个,刚开始只获取一开始要展示的内容,切换页卡时,重新从服务器获取内容

页卡一

获取全部数据,控制选中态

  • 给新闻模块,添加id
  • 新建news_box.js模块
    • 获取服务器数据
    • 实现数据绑定:动态拼接html字符
      • 先整体评估下,获取到所有接下来要操作的元素
      • 注释掉静态页面中,需要动态生成的结构;给新闻部分添加loading样式类
        • 结构可能需要重写,注意服务器返回的数据
    • 实现鼠标划过时,控制每部分的显示
      • 循环菜单栏,当前选中的有样式类,其他未选中的则移除样式类
      • 同步菜单栏和新闻栏

news_box.js

1
2
3
4
5
6
7
8
9
10
11
12
13
14
15
16
17
18
19
20
21
22
23
24
25
26
27
28
29
30
31
32
33
34
35
36
37
38
39
40
41
42
43
44
45
46
47
48
49
50
51
52
53
54
55
56
57
58
59
60
61
62
63
64
65
66
67
68
69
70
71
72
73
74
75
76
77
78
79
80
81
82
83
84
85
86
87
88
89
90
91
92
93
94
import http from './http.js'
let newsBox = document.querySelector('#news-box'),
tab = newsBox.querySelector('.news-box-header'),
tabList = Array.from(tab.querySelectorAll('li')),
tabSpan = Array.from(tab.querySelectorAll('span')),
content = newsBox.querySelector('.news-title'),
contentList = []

// 实现数据绑定
const binding = function binding(data) {
let str = ``
data.forEach((item, index) => {
str += `<ul class="${index === 0 ? 'active' : ''}" name="${item.name}">`
item.data.forEach((item2, index2) => {
let {
title,
href,
time,
type
} = item2
if (index2 === 0) {
str += `<li class="title-header">
<a target="_blank" href="${href}">${title}</a>
</li>`
return
}
str += `<li class="title">
<span class="item-category">
<span class=" ${type === '视频' ? 'video' : ''}">${type}</span>
</span>
<a class="item-tite" href="${href}">${title}</a>
<span class="item-time">${time}</span>
</li>`
})
str += `</ul>`
})

content.innerHTML = str
contentList = Array.from(content.querySelectorAll('ul'))
// console.log('contentList', contentList)
}

// 实现页卡切换
const handle = function handle() {
// 方案一:基于forEach实现
// tabList.forEach((item, index) => {
// if(index === 0) item.className = 'first'
// item.addEventListener('mouseover', function (params) {
// // this指向鼠标划过的对象,这里是span
// let self = this
// // 当前选中的有选中样式,其余的移除选中样式
// self.className = 'active'
// tabList.forEach((item2, index2) => { // 这里用箭头函数,用到的是上下文的this
// if(item2 !== this) {
// item2.className = ''
// }
// })

// contentList[index].className = 'active' // 先给所有的子元素都添加active样式类,然后通过比较循环以下标获取的对象是否相等,对非选中的对象移除样式类
// contentList.forEach(item=> {
// if(item !== contentList[index]) {
// item.className = ''
// }
// })
// })

// })

// 方案二:for循环配合let
// 方案三:for循环+var+自定义属性
// 方案四:使用事件委托。为啥我用了事件委派,页面明显更慢了呀(是因为结构里还有一层)
tab.addEventListener('mouseover', function (ev) {
let target = ev.target
if (target.tagName === 'SPAN' && target.className !== 'active') {
tabSpan.forEach((item, index) => {
item.className = item === target ? 'active' : ''
})
contentList.forEach(item => {
item.className = item.getAttribute('name') === target.innerText.trim() ? 'active' : ''
})
}

})


}

http.get('/news_item').then(data => {
// console.log(data);
content.classList.remove('loading') // 拿到数据后,移出loading样式类
binding(data) // 数据绑定
handle()
})

lolWebsite

课程结束,剩余部分自己实现